Last saturday we played a most engaging battle of Hail Caesar at our club, pitching the romans against the hordes of celts.
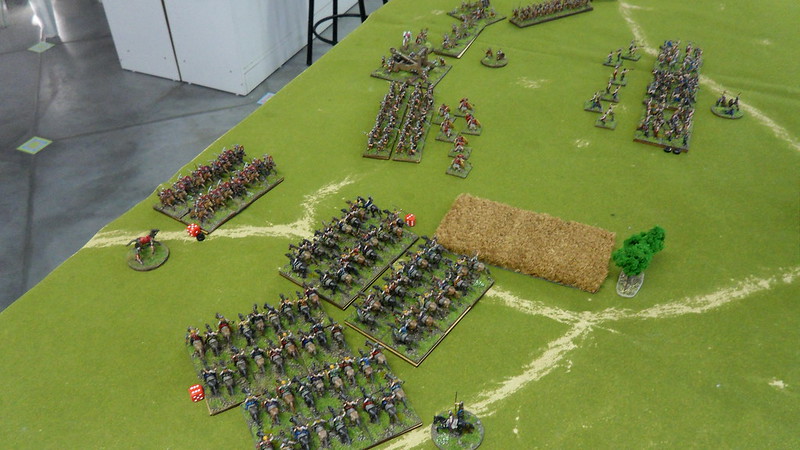
The romans, commanded by my friend Muller, had plenty the following disposition:
General: Julius Caesar
1º Division - Left Flank:
3 Legionary Cohorts
1 Auxiliary Cohort
1 battery of scorpios
1 Medium Onager
1 small unit of auxiliary archers
2º Division - Centre:
2 Legionary Cohots
2 Auxiliary Cohorts
1 battery of scorpios
1 Medium Onager
1 small unit of asian archers
3º Division - Right Flank:
3 Legionary Cohorts
1 battery of scorpios
1 Medium Ballista
1 Heavy Onager
1 small unit of baeleric slingers
4º Division - Reserve cavalry
2 Units of auxilary cavalry
1 unit of Praetorian cavalry
1 unit of Numidian cavalry
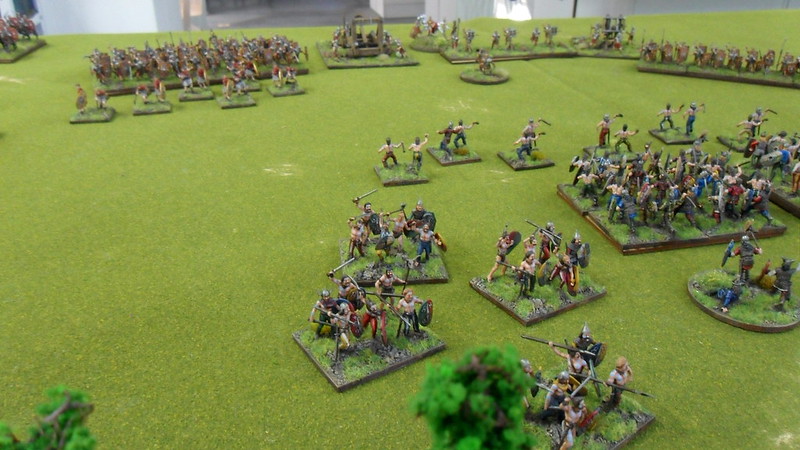
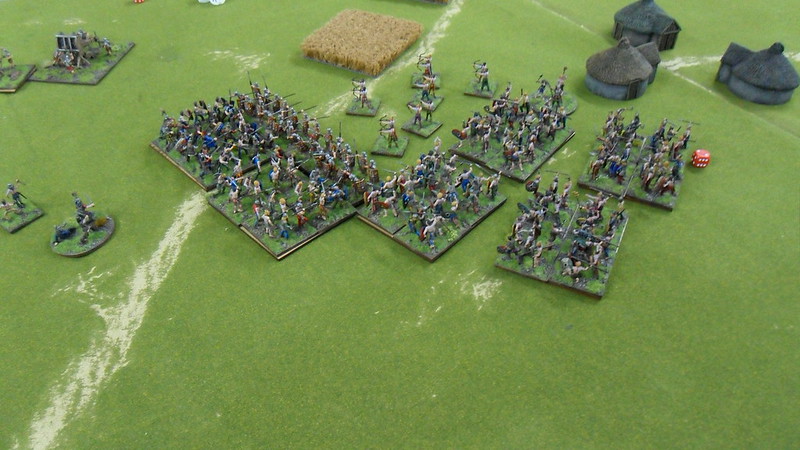
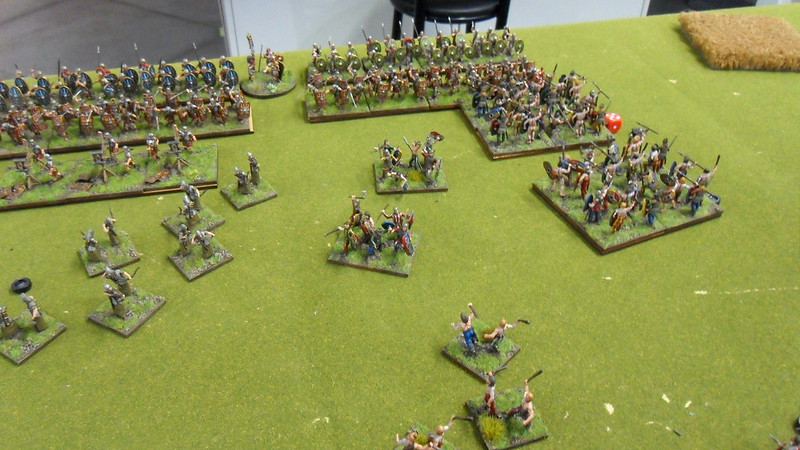
The gauls, commanded by me, had 3 divisions of 4 warbands + skirmishers, each, and another division of 3 warbands only (but this time belgae) + skirmishers.
I also had a full division of cavalry in reserve, with 4 strong units of horsemen.
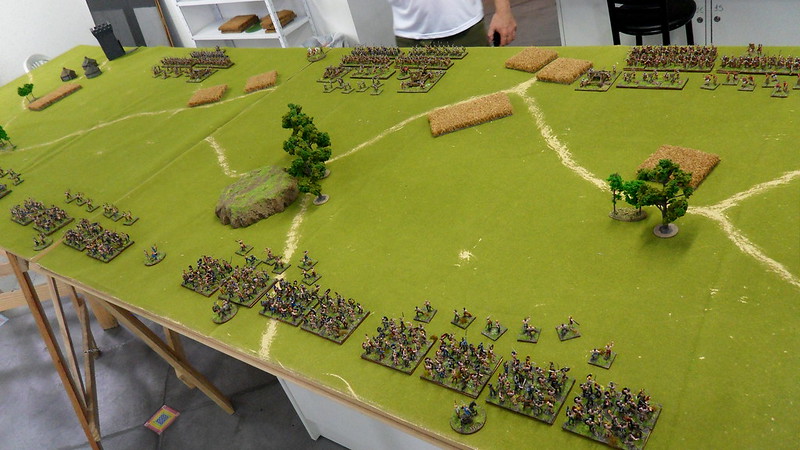
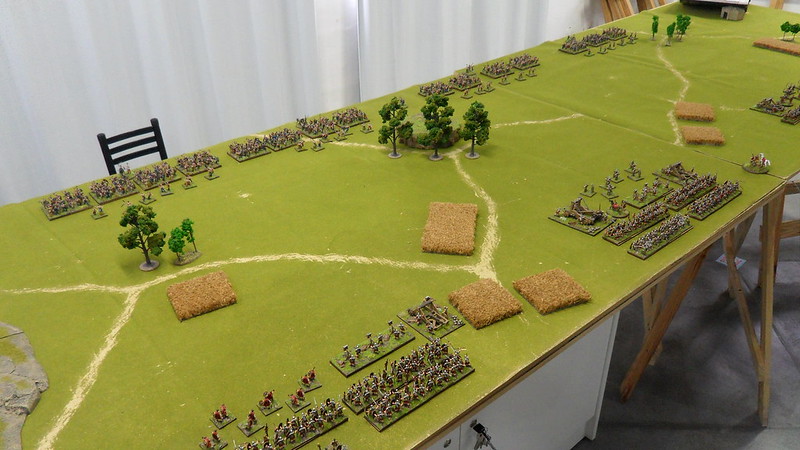
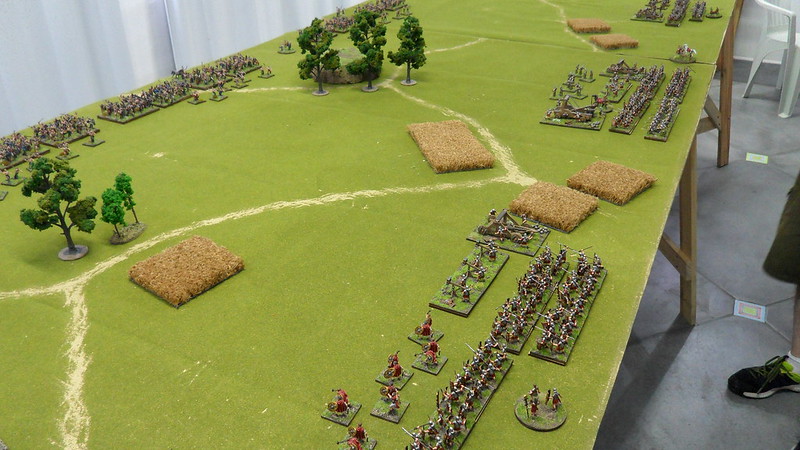
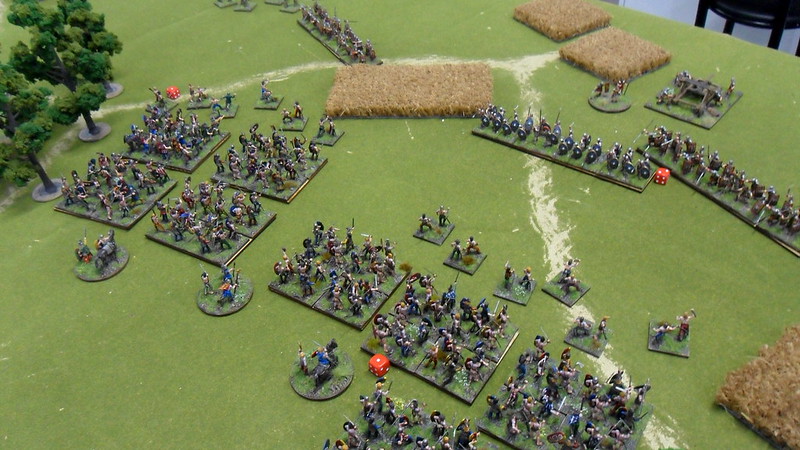
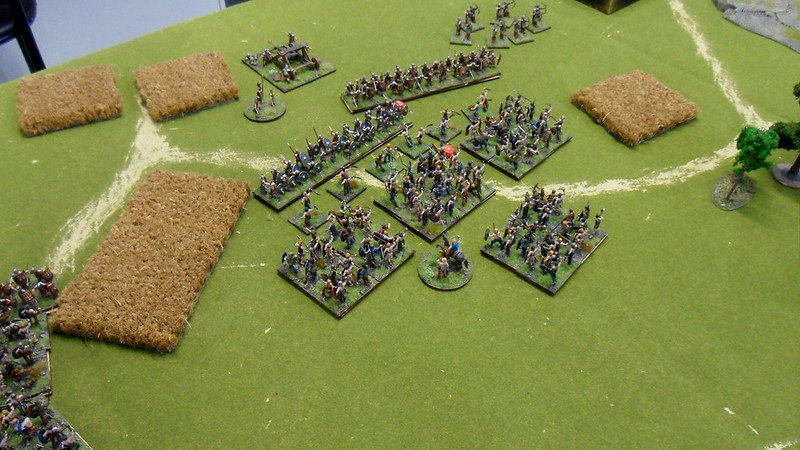
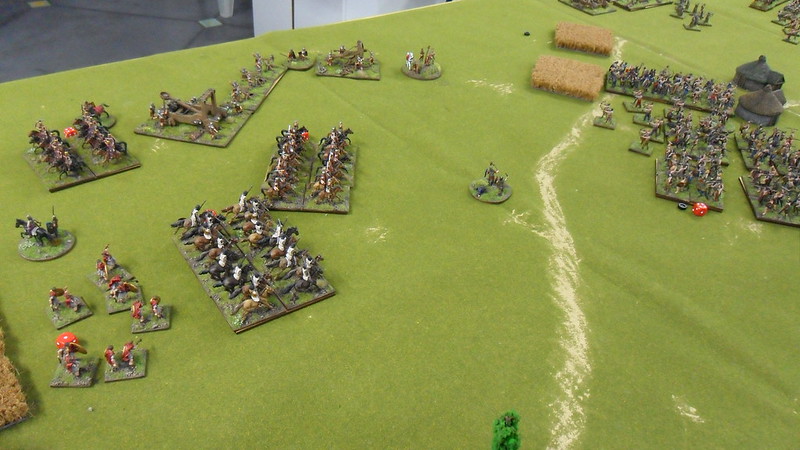
The celt deployment
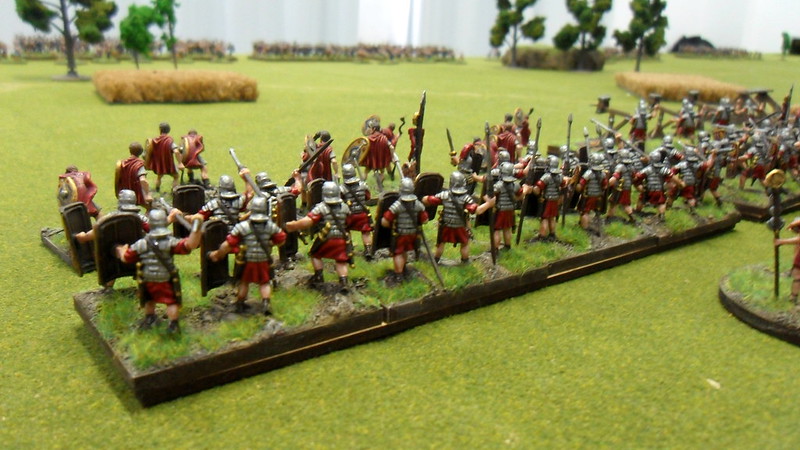
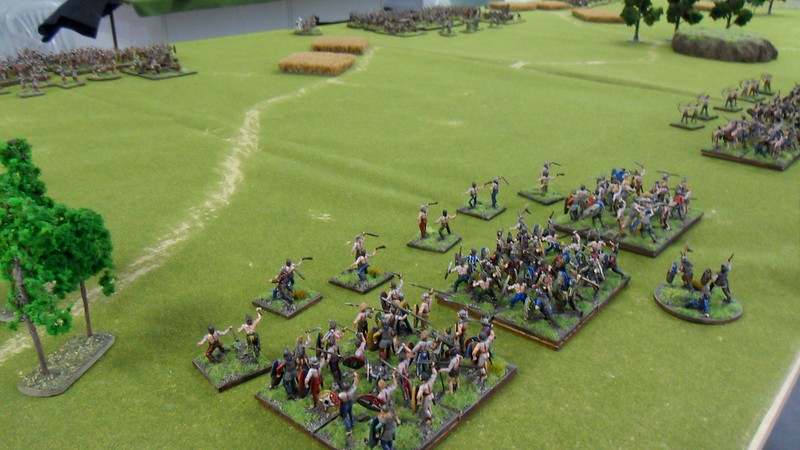
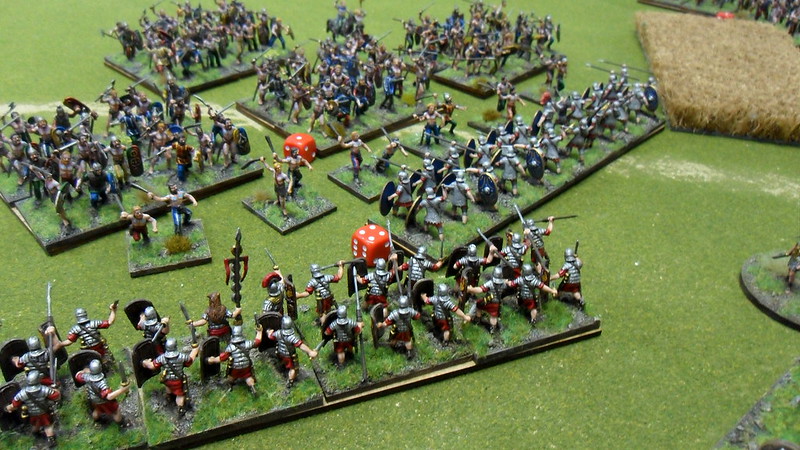
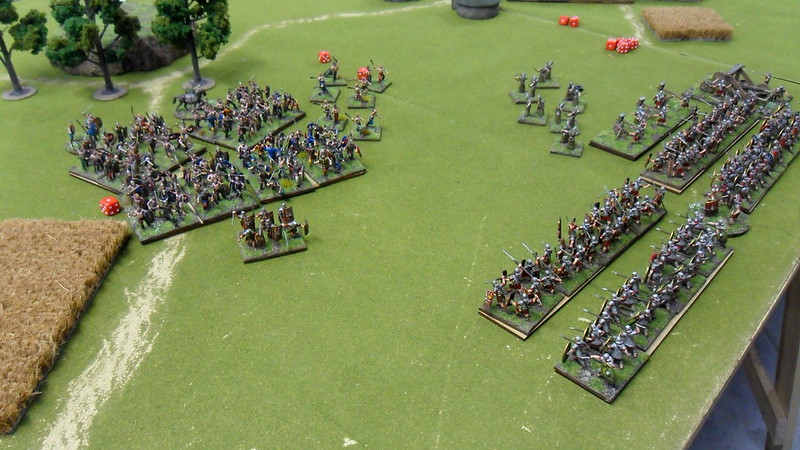
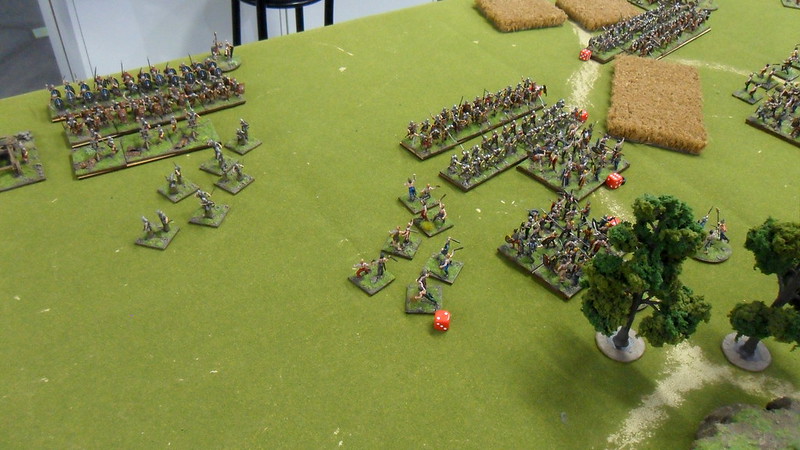
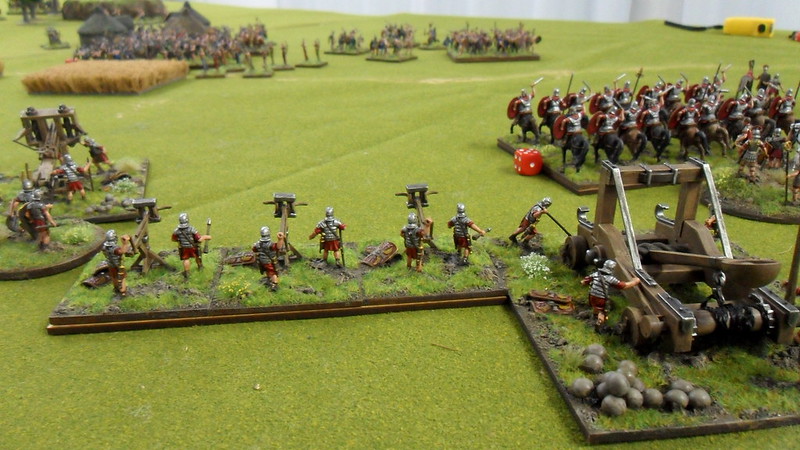
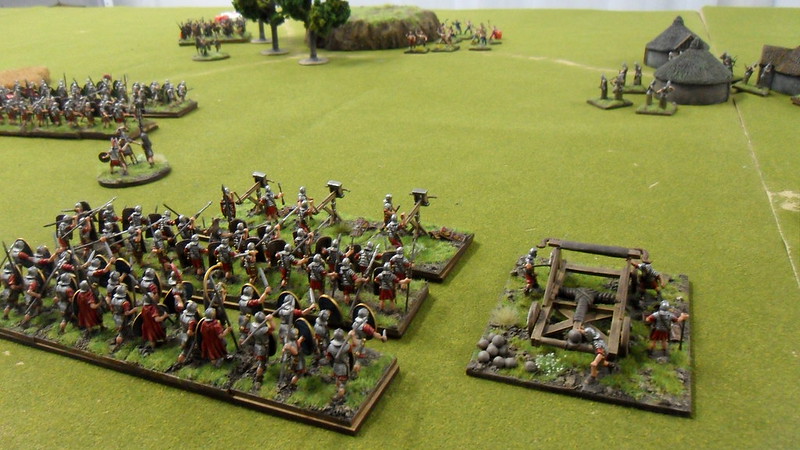
Battle-hardened legionaries form their lines to face the advancing barbarian warbands.
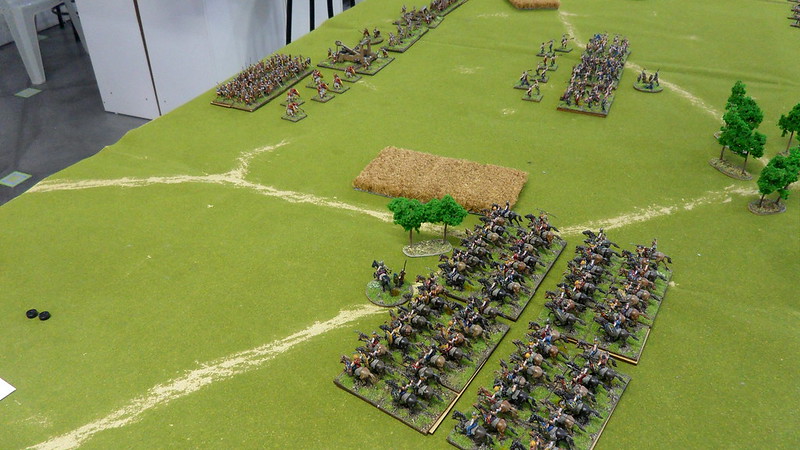
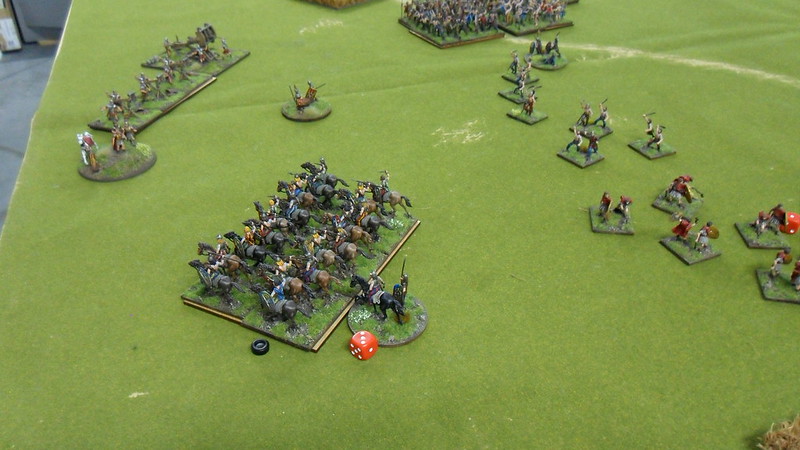
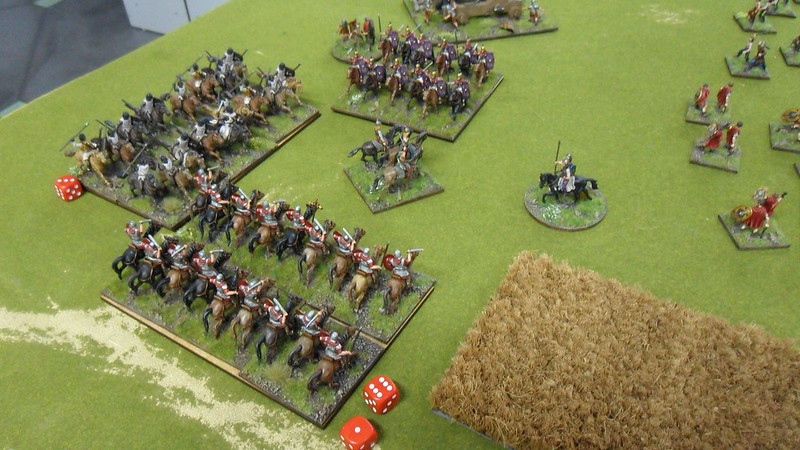
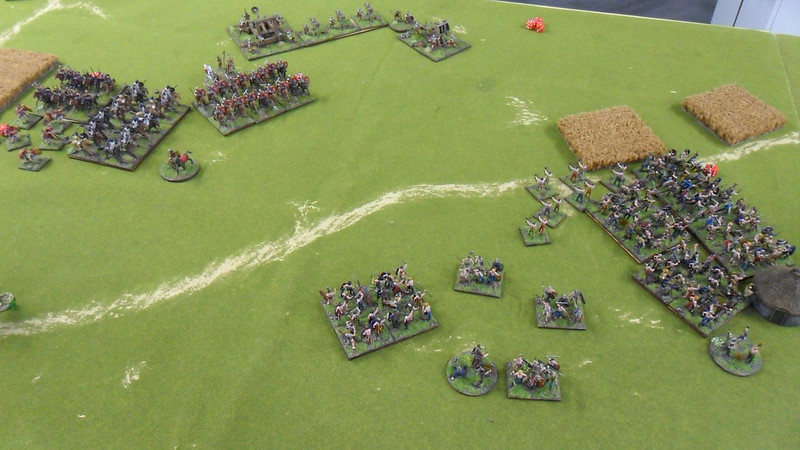
The barbarians started off commanding their cavalry onto the battlefield, entering at the army's left flank, in order to strike at the roman right, which the gallic general deemed the most fragile.
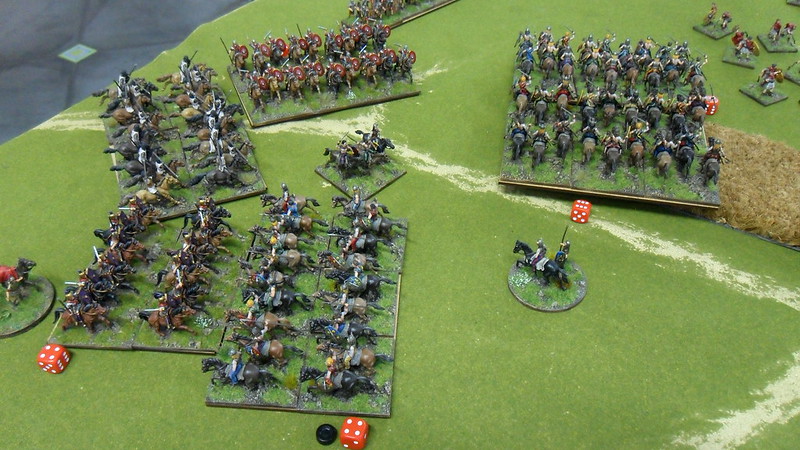
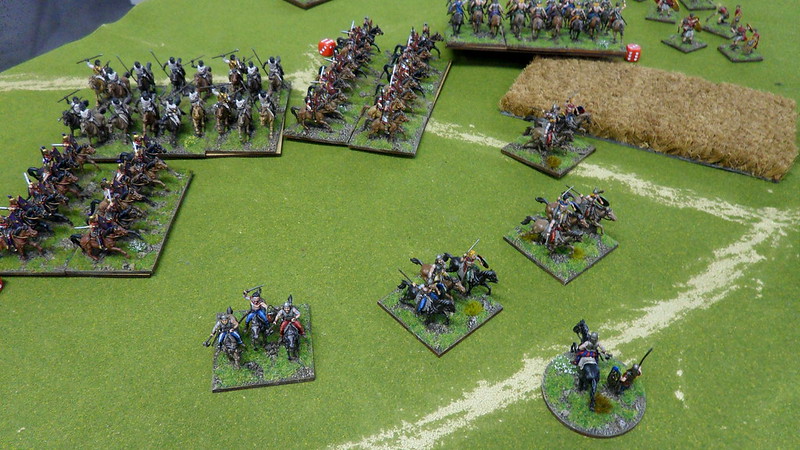
Good command guaranteed a most decisive advance by the celt horses, which forced the roman general to dispatch his own cavalry to intercept the enemy horsemen.
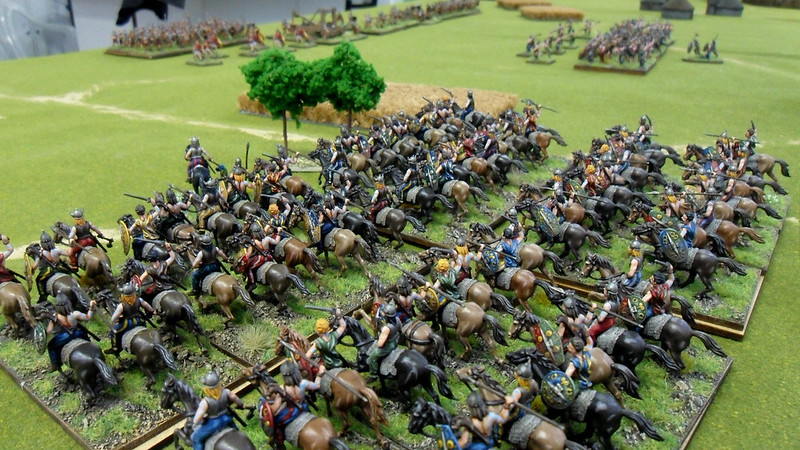
The first cavalry clash saw the gauls at advantage - a unit of auxiliaries fled, and the rest of the roman horses fell back in disarray.
The gallic cavalry, despite the heavy losses sustained in the clash, took the oportunity to strike at the legionary cohorts, which were also under pressure by a full division of warbands advancing towards them, under heavy roman artillery fire.
The roman artillery spread terror among the barbarian ranks. A direct hit from a heavy onager sent the commander of a belgae warband flying to all directions, which caused his fellow tribal men to panic and flee the battlefield early on, many of them wounded by splinters of bone of their pulverized commander.
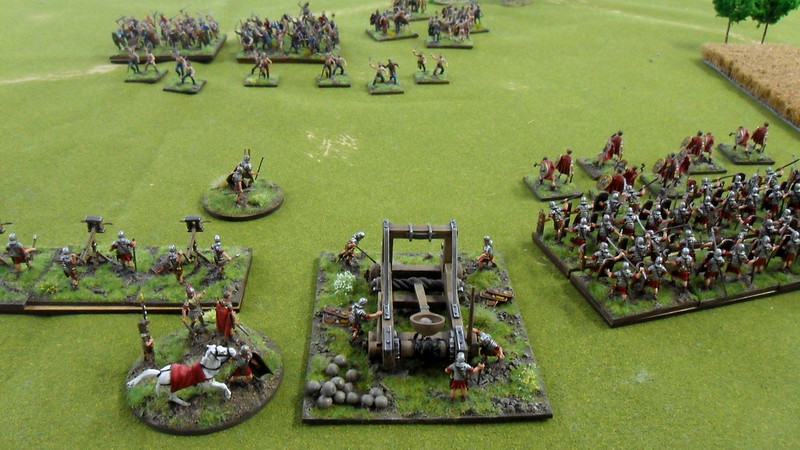
The roman crew cheer loudly, at the sight of the fleeing barbarians, but their exultation is short-lived. The celtic cavalry strike at the flank of the cohorts to the right of the artillery, and cut one of them to pieces. The other cohort holds its ground, and the enemy cavaly falls back to regroup.
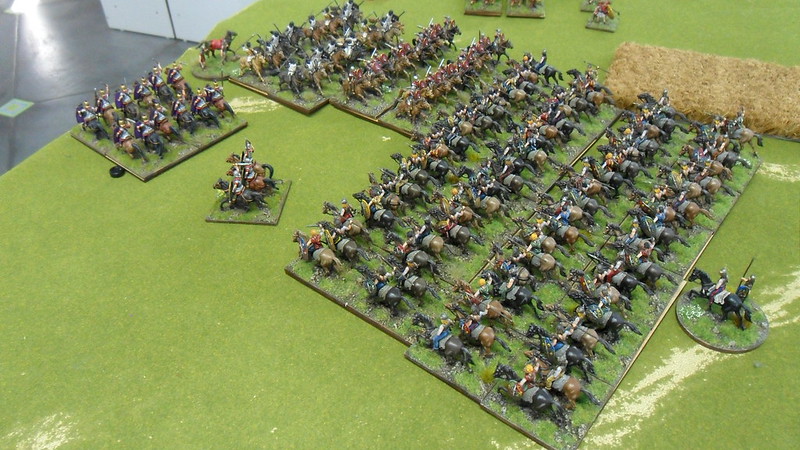
The roman cavalry quickly reforms and pushes forward to a second strike at the barbarian horses, this time smashing them and breaking the division. A single unit of celtic horses survive the clash.
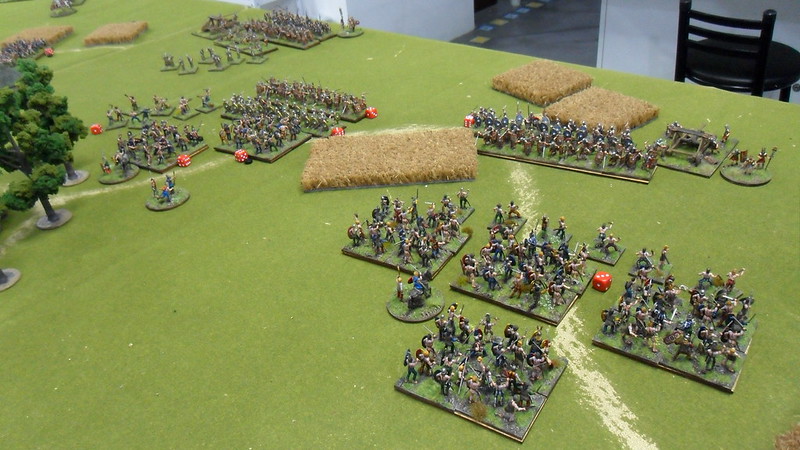
At the roman left flank, the barbarians begin a push, covered by their screens of skirmishers, who punish the roman lines with unrelenting waves of stones. The roman artillery responds, creating gaps in the celtic formations, but failing to halt their advance.
Back in the celtic left flank, most of their horses are put to flight, but the commander manages to rally the single remaining unit of his horses around him, and with a soulful speach reignite their spirits and move them to a final charge, a heroic and suicide renewal of their attack on the second roman cohort, while the roman cavalry is in disarray.
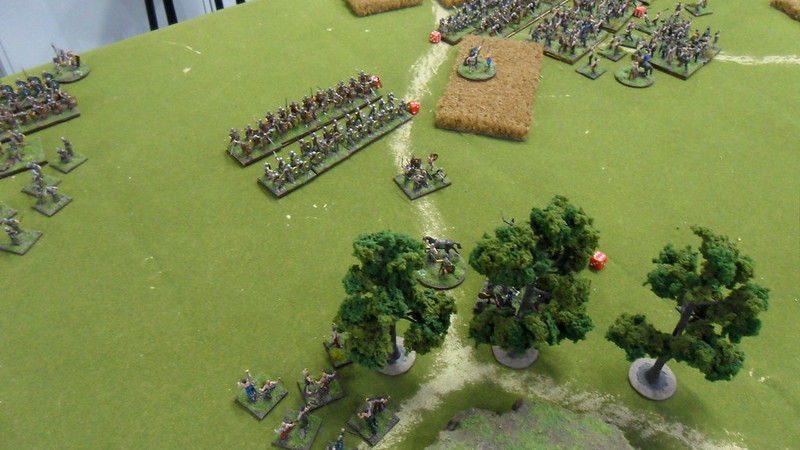
Simultaneously, the centre divisions of the celtic army are sent forward, and quickly surround and destroy an unsupported cohort that had advanced too far. The roman legionaries are cut down in a bloodbath, few surviviors running for their lives.
The roman left flank is also under pressure, but the roman commander keeps giving ground, refusing an all-out engagement, given the overwhelming numerical superiority of the enemy on that area of the battlefield.
The heroic charge of the surviving, though exausted, celtic horses strike against the shielded front of the second legionary cohort, but their impetus is overpowering, causing the legionaries to panic and break.
Having lost all 3 cohorts in that division, the roman right flank is destroyed. Luckly they've still got their cavalry to help stabilize it. They are quickly redirected to surround and destroy the rest of the celtic cavalry.
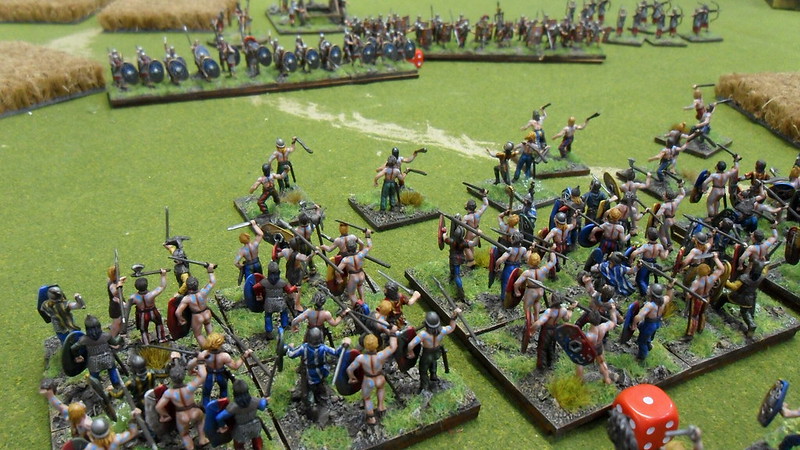
In the middle of the field, another cohort is destroyed by the advancing warbands. This success put the barbarians into a frenzy, and they attempt to sweep advance the roman lines to their front.
However, the roman lines ahead are very well formed, closely deployed to offer mutual support. They close ranks to withstand the first clash of the barbarian charge. Failing to break the enemy, as they did before, the gauls lose momentum, one of their warbands is destroyed, the others fall back, giving the romans some well-needed breathing space.
At the roman right front, the heroic celtic horsemen are completely surrounded and cut down to the last man.
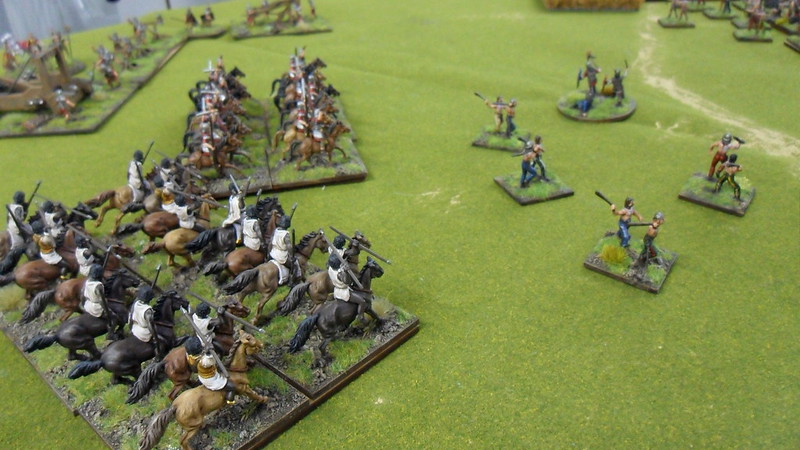
The roman cavalry is by now spent, but they still find some energy left to slaughter the enemy skirmishers nearby, preventing them from harassing the roman artillery.
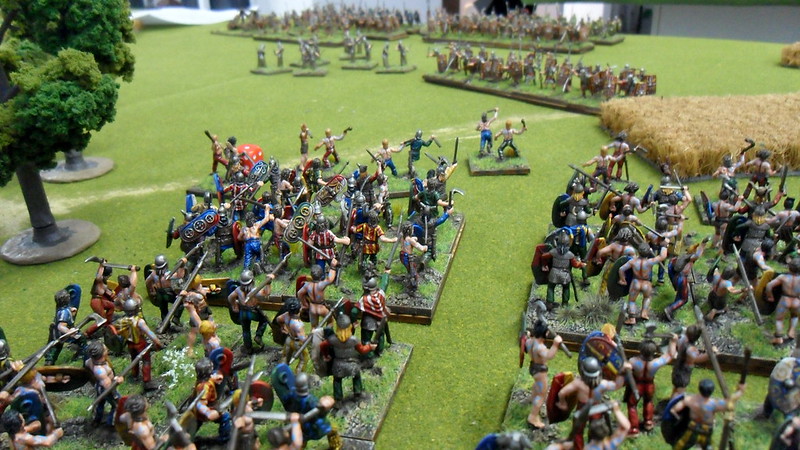
In the centre, its time for the romans to counter-attack. 2 cohorts are sent to chase the barbarians as they fall back to reform, after their failed charge.
The roman left flank continues to give ground little by little, having lost a legionary cohort, and with an auxiliary one in bad shape.
The roman centre counter-attack proves utterly effective, and completely smashes the barbarian centre. With a second enemy divison destroyed, the romans revert their initial setback and take the upper hand in the battle.
The celts try to reform their left flank. Having destroyed the enemy cohorts there, they're are still under threat by the enemy cavalry and artillery. They try to march to the middle of the field to help the fight against the strong roman centre, but find themselves pinned by artillery fire to the left (and the threat of a cavalry advance), and skirmish fire to the right.
However, the roman general is well aware his cavalry is currently in no shape to renew their efforts, and orders his commanders to rally their horsers and hold lines, instead.
With morale failing, the celt commanders find it ever more difficult to move their warriors around. Meanwhile, the enemy artillery keeps pounding at their ranks, killing scores of their men and spreading terror. Another warband is put to flight, which triggers an army-wide retreat. The day is lost for the gauls.
The romans observe the retreating barbarians.
The romans win a hard fought battle, balanced to the end. It's however unclear to what extent they would be able to exploit the enemy retreat, given that their own cavalry was pretty spent at this point, but this marks another step in Caesar's efforts to conquer Gaul.
What a great report and what a splendid battle...I really enjoyed this one, wonderful minis and a nice (and bloody) end whan the artillery's spreading terror...
ReplyDeleteReally Excellent! A BatRep well worth reading with loads of lovely painted minis
ReplyDeleteExcellent.
ReplyDeleteReally Excellent!
ReplyDeleteMarvelous painted armies for Hail Caesar !!!
ReplyDeleteYou inspire me !
Please, can you tell me the dimensions you have for your bases in order to play Hail Caesar in 1/72 ?
Thanks for your help !!
Regards from France
Tane, I use 5cm wide x 4cm deep bases for infantry, 4 bases per unit. For artillery and cavalry, I use 5cm x 5cm bases. 3 bases per unit of artillery (if small artillery pieces, such as scorpios) and 4 to 6 bases for units of cavalry.
DeleteThanks a lot for your help !!!
DeleteBest regards :)
Do you think it's possible to use 4cm x4cm for infantry ? and what about bases for slingers (2 miniatures ) ?
ReplyDeleteThanks again for your help !!
regards
Tane, you'd have to test that. I'm afraid 4cm x 4cm might prove too narrow. In napoleonics, I use 8 models per base, while in ancients I use only 6, because their equipment and irregular poses take more space to accomodate.
DeleteSkirmishers I base on 3cm x 3cm.