Showing posts with label Star Trek. Show all posts

Monday, March 20, 2017

Federation Fleet

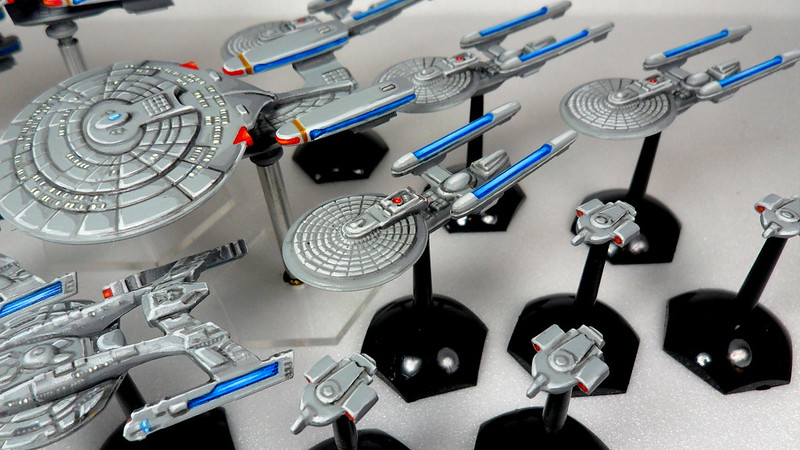
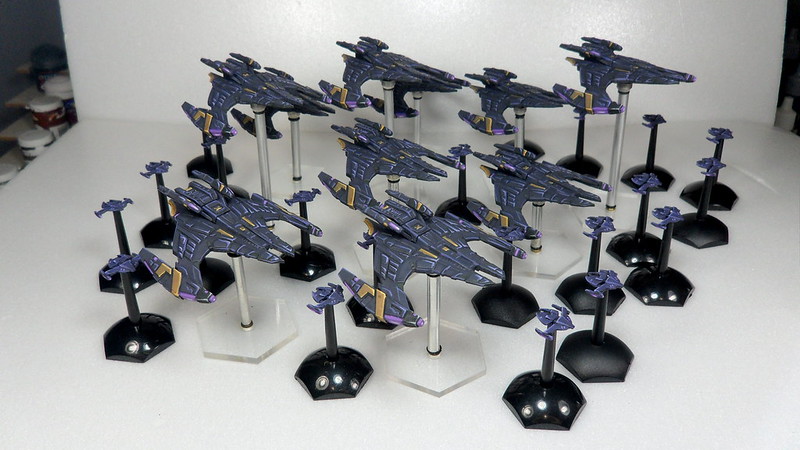
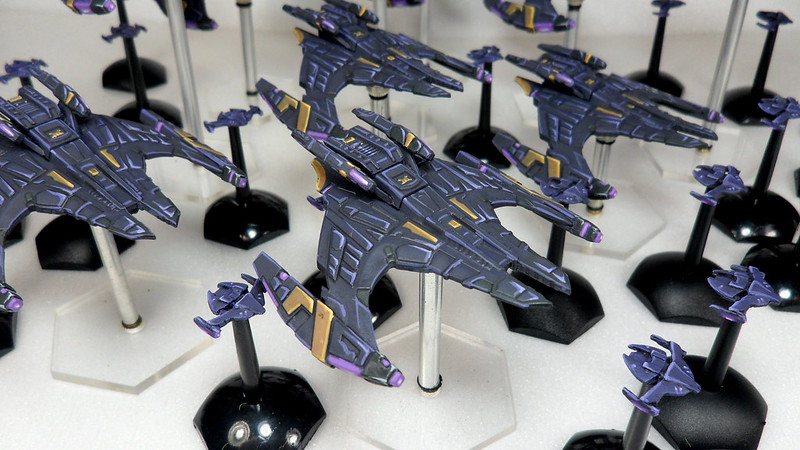
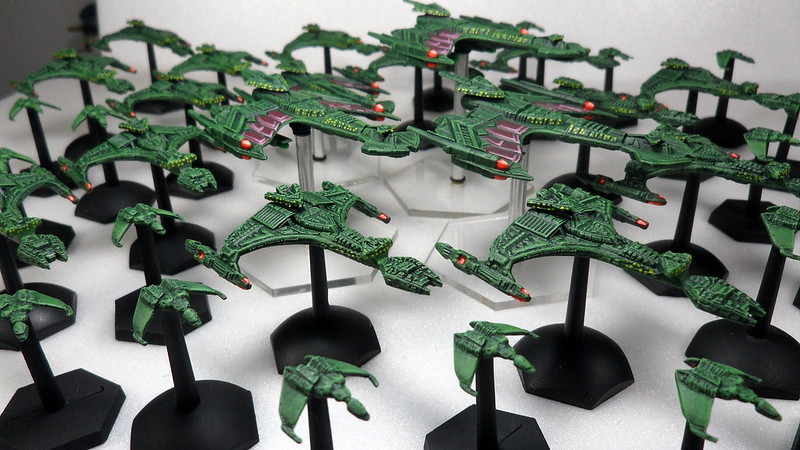
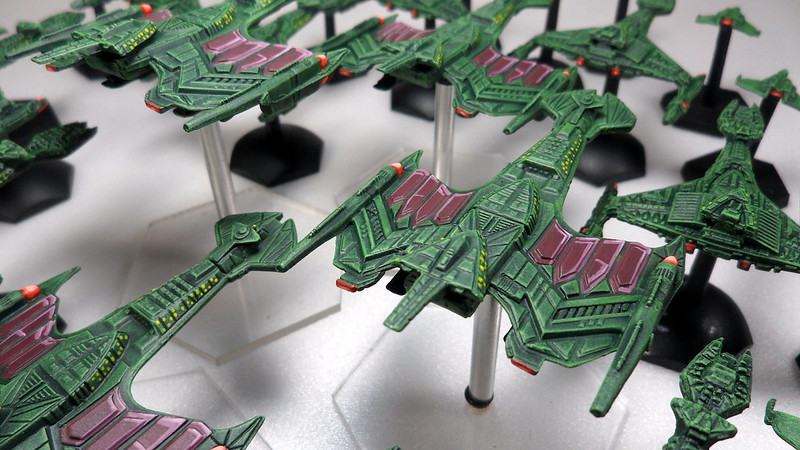
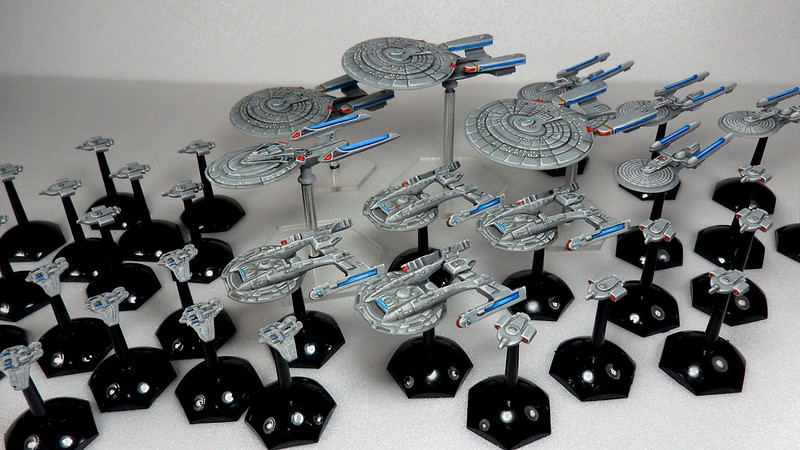
I've finally finished my Federation fleet. A project I've been working on for quite some time now. This is the last fleet I needed to complete my project of the Dominion War, and now I have fleets for all powers involved in the conflict.

SAM_0770

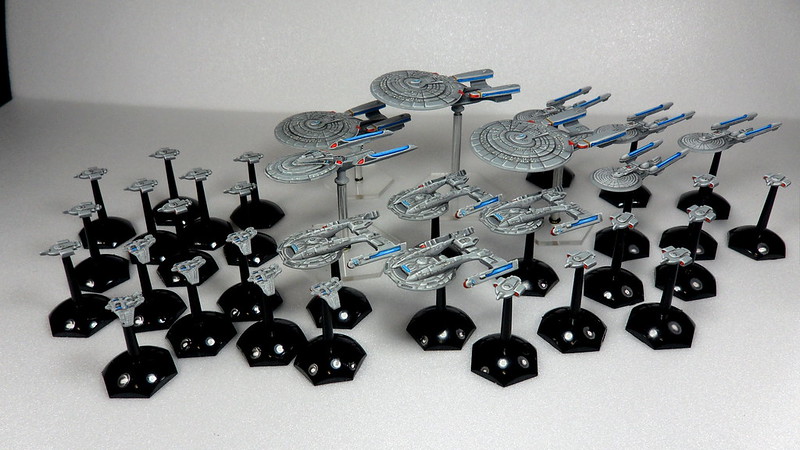
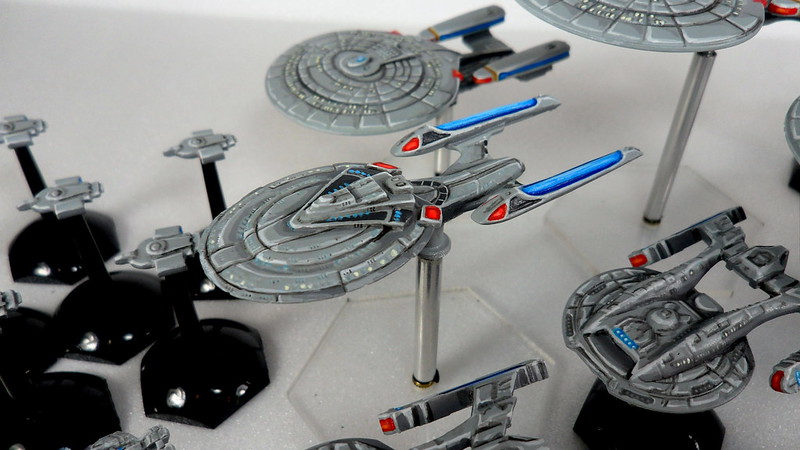
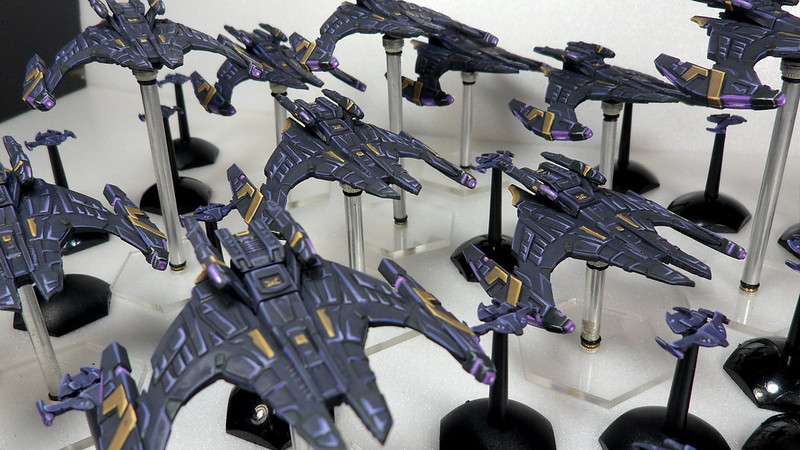
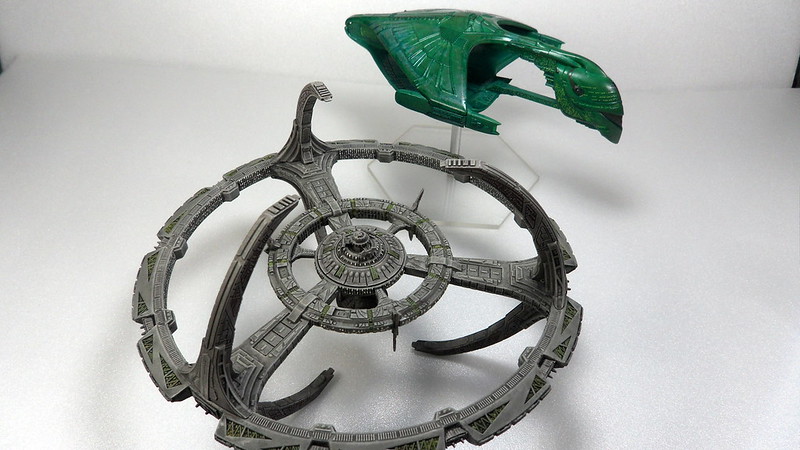
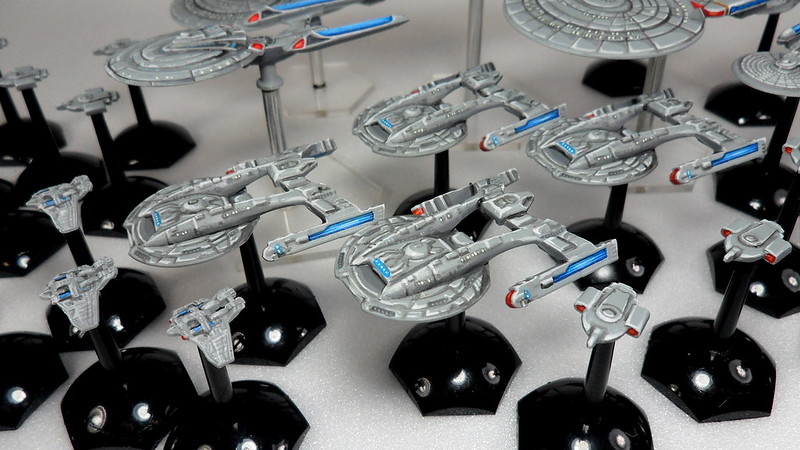
The ships in this collection come from a couple sources. The defiant-class ships are Studio Bergstrom's, the first models I purchased for this fleet. The Galaxy-class, Akira-Class and Excelsior Class are Attack Wing's, while the Sovereign Class is actually a key ring accessory, a gift from a friend that happened to match the scale of the rest of the fleet perfectly!

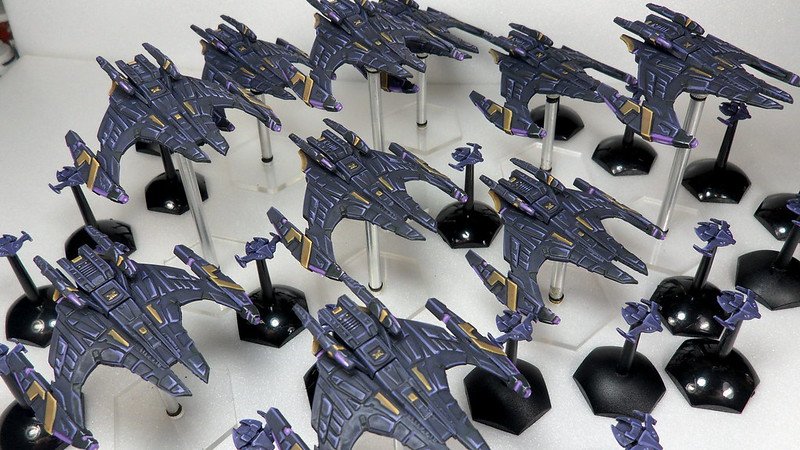
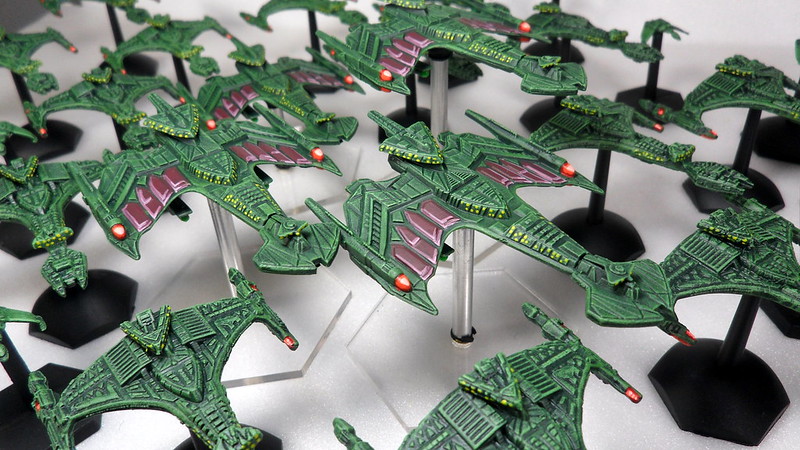
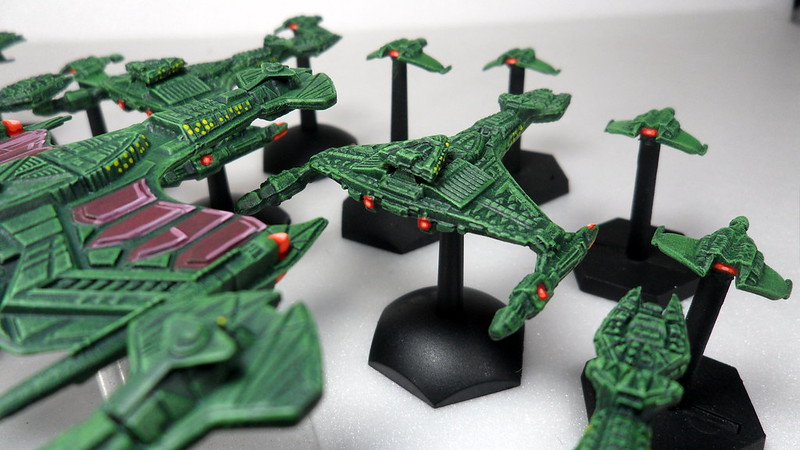
Speaking of scale, this is the reason this fleet took so long to complete. My entire collection of star trek ships are in scale to each other. Exact scale in most cases, close enough in others. When it comes to the Federation, I had to wait for Wizkids to release some classes of ships that were in scale with the fleets I already had (something around 1/9000), particularly the Galaxy-class, which I definitely wanted in the fleet.

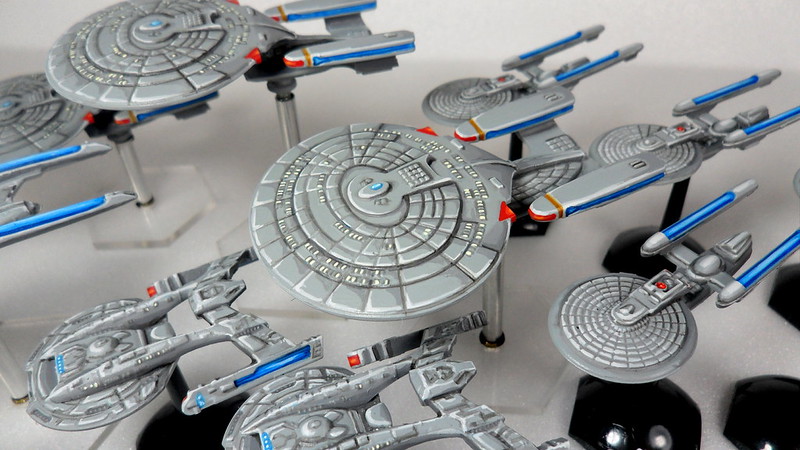
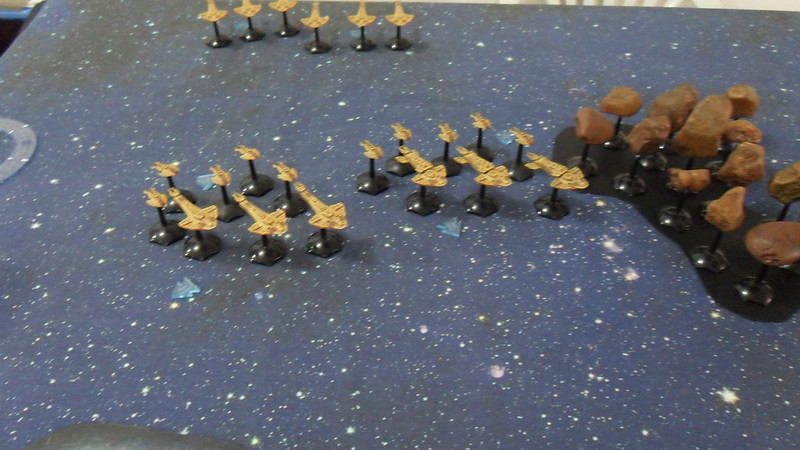
They had already released a Galaxy, the Enterprise itself, in the Starter Set, but I needed at least 3 or 4, and wasn't going to purchase that many starter sets, when the only thing I needed on each was a single ship. So I had to wait for Wizkids to make the Galaxy available by itself, and it happened recently, in the form of the USS Venture. Together with the Akiras and the Excelsiors, I then had enough variation of classes to come up with a proper fleet. (their Nebula-class is also in scale, but I figured 4-5 classes of ships was enough, without being too much).

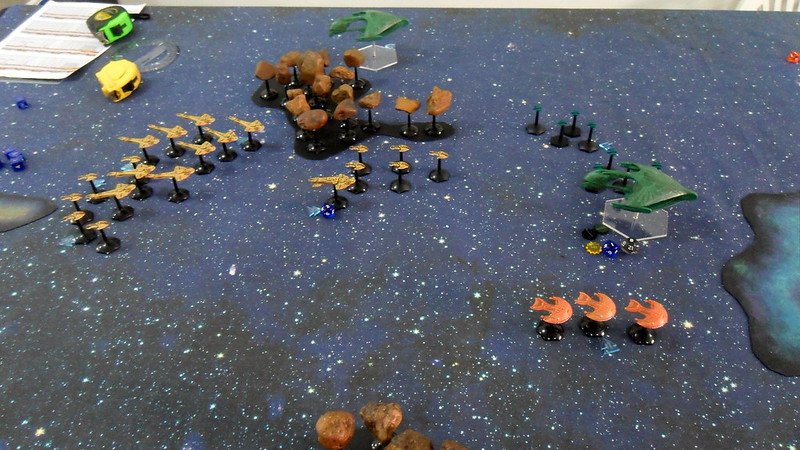
Once I had all models I wanted to build the fleet, I gave them a paint job to make them look uniform enough, a proper fleet (even though in-universe, different classes of Federation ships have all kinds of shades of grey).

SAM_0771

SAM_0772

SAM_0774

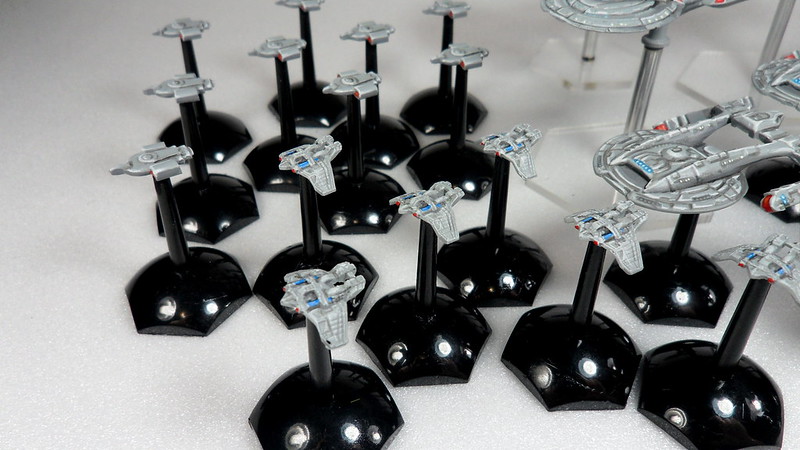
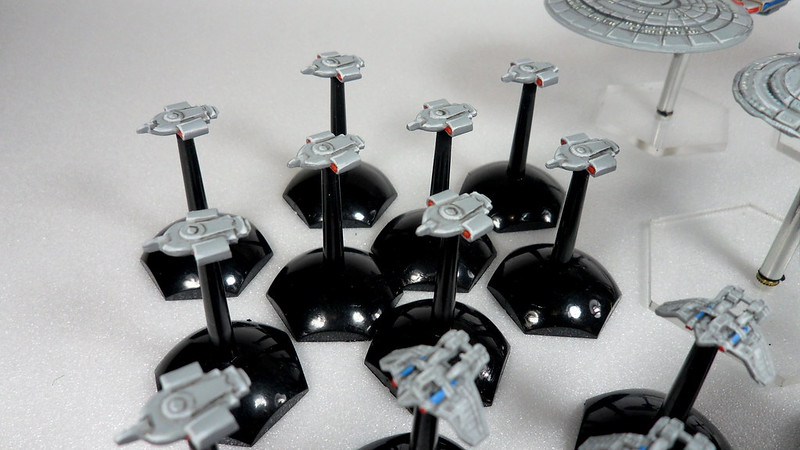
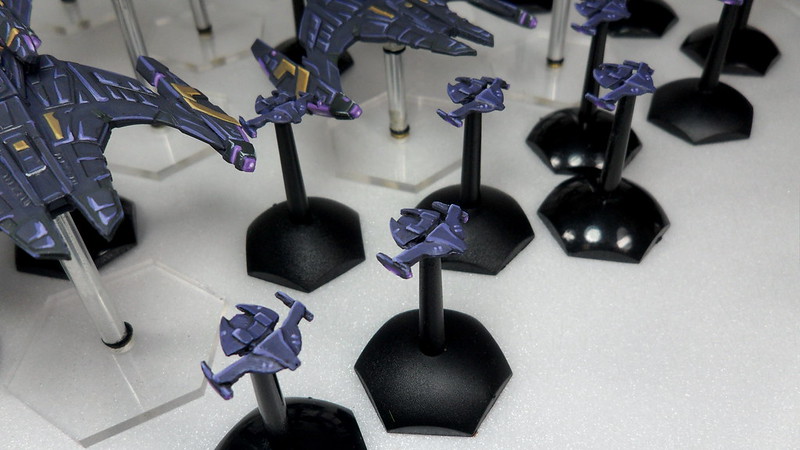
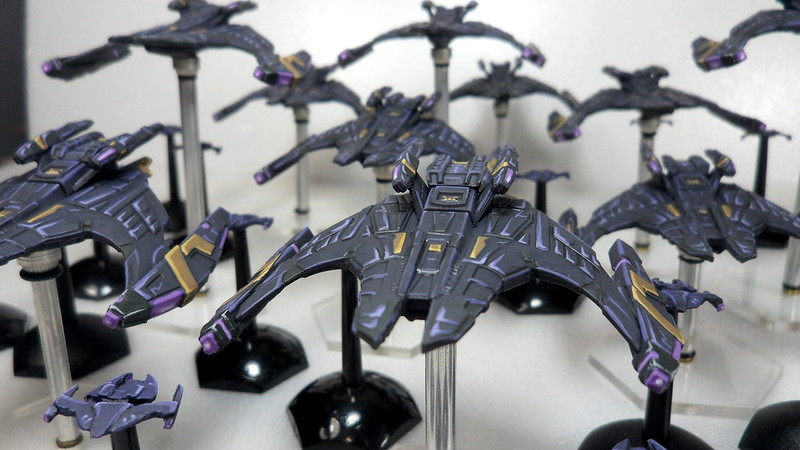
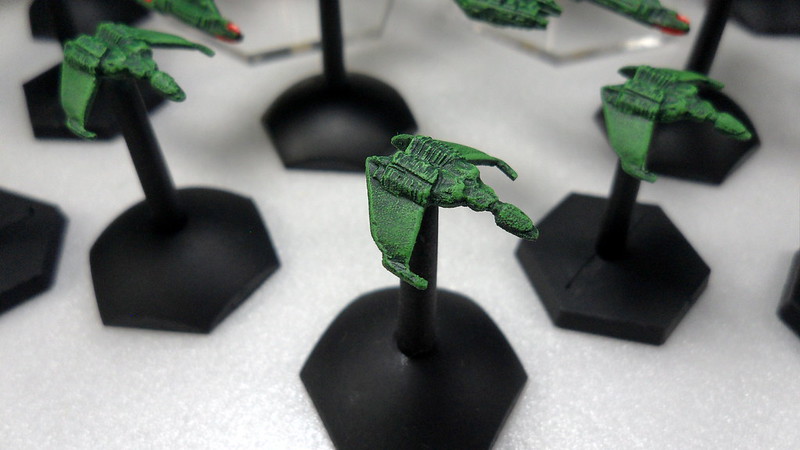
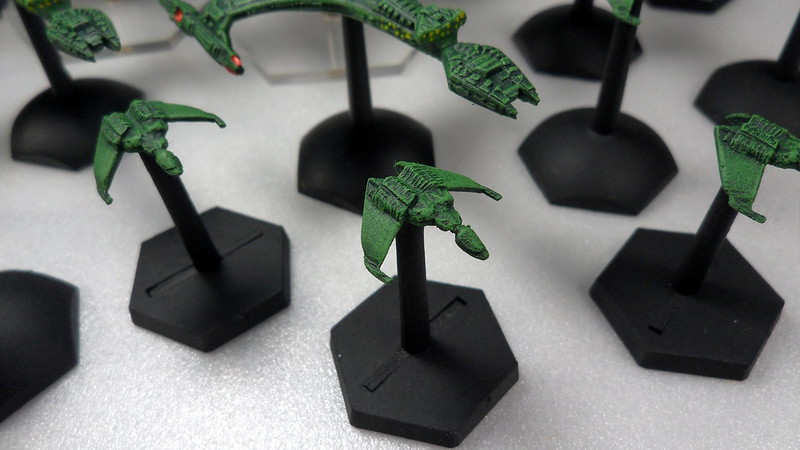
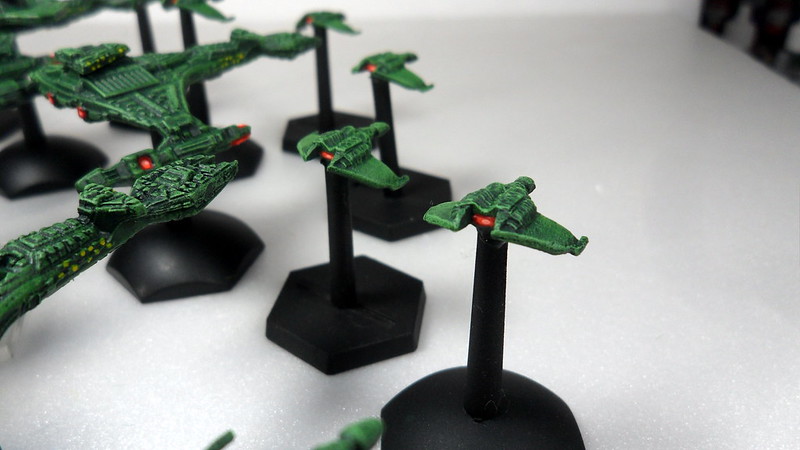
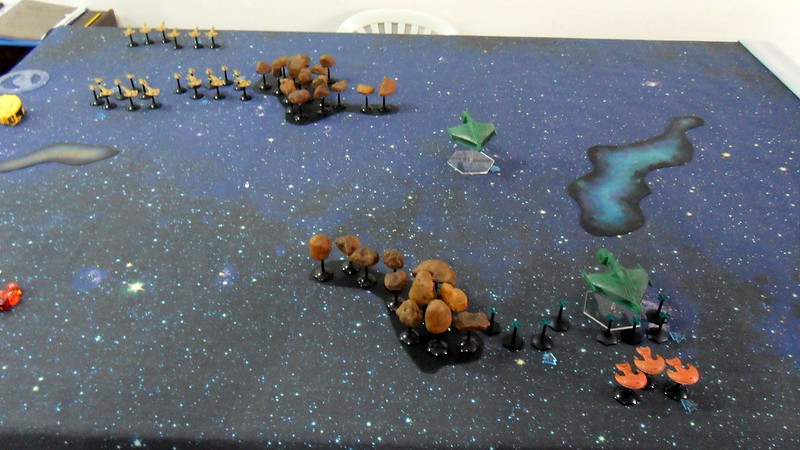
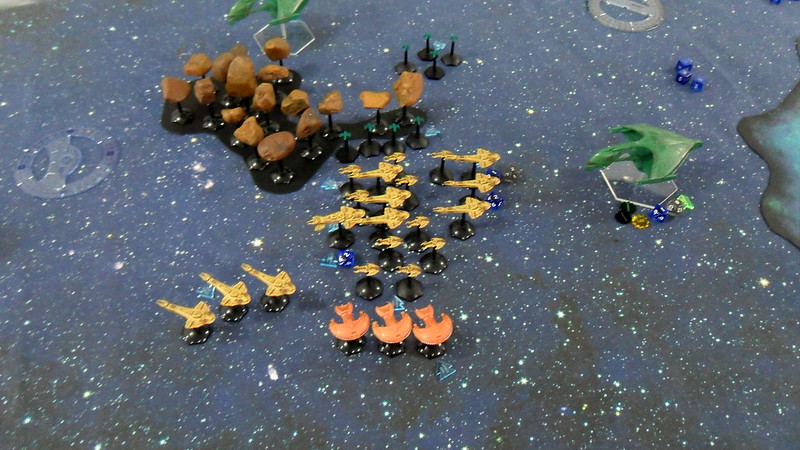
The Peregrin-class attack ships above are an example of close-enough scale. They should actually be considerably smaller than the Defiants next to them, but there are no such models available for these ships that I'm aware of, so these will have to do. They're sufficiently small to represent the fact that they are tiny attack ships, so that's good enough, I suppose.

SAM_0775

SAM_0776

SAM_0777

SAM_0778

Wednesday, March 8, 2017

A battle on the Klingon-Cardassian War

Here's a brief Battle Report of a game of Pax Stellarum we recently played at our club, featuring some of the main races of the Star Trek universe.


The Klingons invaded Cardassian territory on 2372, under the assumption that the Dominion was infiltrating the Alpha Quadrant with the support of the Cardassian Union.

By the beginning of year 2373, the Klingons had advanced far into enemy territory, putting the Cardassian military into complete disarray. Just when ultimate victory seemed to be only months away, the invaders were suprised by the disclosure of the Dominion-Cardassian Alliance, and the major power of the Gama Quadrant quickly joined in the war effort, pushing back the all-conquering fleets of the Klingon Empire.

This game we played represent one of those battles where the combined Cardassian-Dominion forces engage the Klingons, currently occupying large portions of cardassian space.

I controlled the cardassians/jem'hadar, while my friend Rafael Soar, also a Star Trek enthusiast, controlled the klingons.


20170228_172603
A view of the battlefield from the dominion/cardassian deployment (there is another squadron of Galors, on the far right of the table, visible on the pic below)


20170228_172634
The Klingon Deployment


The Klingon flagship Negh' Var, commanded by Chancellor Gowron, was present to this battle, giving this ship a Command Rating 7.

I also had a command ship - one of the jem'hadar battlecruisers - but mine had a Command Rating 6, only (we can assume it had a high-ranking Vorta aboard). Still, good rolls granted me Initiative on most turns, including the Initiative of Deployment.

That being, I chose my opponent to deploy first, and seeing that his klingon fleet was somewhat concentrating in the centre of their deployment zone, I chose to attempt to flank his forces with my galor squadrons, leaving the jem'hadar to deal with the bulk of the enemy forces in the middle.

20170228_185031

The Galor squadrons quickly advanced to flank the enemy on both sides. On the right of the klingon deployment, a squadron of Vorchas engaged the cardassians, but were overran after a couple turns. On their left, the klingons had no elements selected to intercept the cardassians, so they made their way to the rear of their formations without trouble.

20170228_192236

In the middle of the battlefield, the fleets exchanged fire at close range, inflicting severe damage on each other. My flagship was blown apart, and the klingon flagship almost had the same fate.

20170228_194455
The sole Vorcha still left on the right flank of the klingon formation, severely damaged and with a number of systems down, tries to turn away from the onslaught of the enemy advance. Such dishonored ship wouldn't last much longer, though.


20170228_194500

The battered jem'hadar battlecruisers accelerate past the klingon lines, to avoid their powerful forward arcs of fire, leaving the fighting to the flanking Galors to their right, while they attempt to maneuver into position to fire at the enemy from their rear.

The agile Birds of Prey quickly pivot to face the jem'hadar, putting the enemy Shields under constant pressure.


20170228_201208

The flanking tactics pay off, and the confused klingon ships find themselves surrounded and engaged on several fronts, what forces them to maneuver to face one flank, turning their back to the other.

After 6 turns, played over 3h, we agreeded that the klingon forces were in no shape to continue fighting, and in order to preserve their crippled flagship, they chose to jump into warp and release their hold on yet another cardassian system!

Monday, October 3, 2016

Dominion Fleet

Another fleet painted for my project of the Dominion War, in the Star Trek Universe. 

With these done, there is only the Federation fleet left to. I already have klingons, romulans, cardassians and even Ferengui, which I might choose to use as allies to either side in this conflict. 

SAM_0243

SAM_0245

My goal is to have all classes of ships throughout these fleets in scale to each other - if not exact, at least close enough scale. Therefore, I need to really look around and do some researching to find out what is available.

The fleet of the dominion comprises the small attack ships, which I acquired from Starship Adversaries, and the battlecruisers, from Attack Wing. The attack ships are metal and come unpainted, while the battlecruisers, being Attack Wing, come with a decent paint job already. I only needed to apply some wash and then highlights to get a result I'm happy with.


SAM_0252

SAM_0254

SAM_0255

SAM_0262


Tuesday, October 27, 2015

Klingon Armada

Here is another finished fleet for my project of the Dominion War. 

There are 3 ship classes in this fleet. The small Birds of Prey are from Studio Bergstrom, the Vor'Chas are Micromachines, and the capital ships of the fleet, the Negh'Vars, are from Attack Wing. 

In total, the fleet is composed of 4 Negh' Vars, 15 Vor'Chas and 18 Birds of Prey.

SAM_9200

SAM_9207

SAM_9206

SAM_9204

SAM_9201

SAM_9208

SAM_9209

SAM_9210

SAM_9212

SAM_9216

SAM_9219

Monday, October 19, 2015

Deep Space 9

Following on with my project of the Dominion War, I acquired a Deep Space 9, from the Eaglemoss collection. This model is the closest in scale to the rest of my ships that I could find around. 

Currently, Wizkids also produces a large scale model of this station, but that is way too big, while this one is only slightly on the short side, making it an easy choice in the end.

Here's my station after an upgrade to its painting:

SAM_9169

Here is the factory paint job, which is pretty good as it is, only lacking in contrast/shading:

_DSC5696

What I did was give it a coat of black wash, then drybrush it with light grey. I also applied some green glaze to the details in yellow (I think they look cooler in green) and then finally painted each single window you see on that model, including the entire outer ring, which was a pretty tiring task, but definitely helped bringing the model to life.

SAM_9171


SAM_9172

SAM_9170

Here are a comparison pic to help show the scale of this model. It sits next to a Romulan Talon (about 90m long), a Cardassian Galor (481m long) and a Ferengui D'Kora (366m long). The DS9's diameter is 1451m, according to most sources, which means my model is very close in size, when compared to the rest of my collection.

SAM_9175

Here it is next to a romulan warbird:

SAM_9176

Speaking of romulans, I'll be showing my romulan fleet here on the blog soon, and it features those huge warbirds from Eaglemoss, some talons as that one from the previous picture, and a handful of Attack Wing Valdores. 

Friday, October 16, 2015

Romulans x Cardassians - A battle Report

We played a game of Pax Stellarum at our club a week ago, featuring a battle between a Romulan task force, reinforced by some Ferengui allies, against a Cardassian fleet.

The Ferengui, troubled by the frequent cardassian incursions to their territory, signed an alliance with the Romulans, always too eager to stablish a foothold on the Alpha Quadrant. A Romulan armada was then dispatched to help secure a particularly hot zone on the Cardassian-Ferengui border, and was promptly met by a considerable Cardassian force.

It was a game of about 1800 points per fleet, which played over 6 turns and lasted for a little over 3 hours. The cardassians deployed their ships en masse, while the romulans left some ships in reverse, and maneuvered to flank their enemies.

SAM_9152
On the pic above, a D'Deridex sprints forward to try and flank the enemy by maneuvering around an asteroid belt. Below, the romulan ships left in reserve:

SAM_9155

The cardassians set their engines to high thrust and push forward torwards the combined romulan-ferengui forces.

SAM_9154

The cardassians get in position to unleash their phaser fire on the romulans and ferengui, while a single warbird moves around the asteroids to fire at the rear of their formations.

SAM_9156

The exchanging of disruptor/phaser fire in the centre of the battlefield severely damages the flagship warbird, which ends up being destroyed shortly after. The romulans concentrate their fire against the cardassian Keldons, the enemy's command ships, so to guarantee superiority of Command & Control on the allied side. On the other hand, the forces in reserve are taking too long to arrive, and the lack of guns is taking it's toll on the romulan fleet.

SAM_9160
The cardassian armada, like a shoal, gets surrounded by romulan and ferengui forces.


SAM_9159
The remaining warbird arrives on the 3º game turn, and dashes torward the enemy formations.

The cardassians are losing ships fast, and push past the romulan lines and around the asteroid belt, chasing the rear of a warbird, while using the asteroids as a shield screen against the recently arrived D'Deridex. 

SAM_9163

The Valdore enters the battle on the 5º turn, and now the cardassians use their superior maneuverability to turn around and avoid that side of the battlefield, while trying to score some kills on the talons chasing their formations.

SAM_9161

The closest warbird receives a critical hit to its Starboard weapons' system, and is now unable to fire to its right. Instead of trying to pivot such behemoth in an area full of faster enemy ships, the romulan captain accelerates into the protection of a nearby nebula cloud, so to maneuver more safely, while leaving the fight to the other remaining warbird and the Valdore.

SAM_9164

SAM_9165

SAM_9166
Romulan D'Deridex firing through the asteroid belt at the tiny cardassian Hidekis - not an easy shoot to accomplish!

At the end of the 6° game turn, both fleets had lost more than half their initial hull points and had to take Morale Checks. The Romulans passed and the cardassians failed, which means they leave the field and the romulans claim the victory. 

We then realised that we had added up the cardassians' remaining hull points wrong, and that they actually had to take a Morale Check on the turn before, already, but that didn't impact the result of the battle anyway.

In the end, it was a pretty balanced battle, making for a very entertaining game. I was in command of the romulans, and destroying the cardassian command ships early in the game secured me the initiative on every game turn, which helped compensate the late arrival of my reserves.

 My opponent realised that his tactics of advancing with all his squadrons in a single block wasn't very productive, and that he didn't make good use of the cardassians superior maneuverability and speed until late in the game.